Querying and retrieving data within InfoPath can be confusing mainly because the ‘filter…’ option for data retrieval is sometimes used but not always. This makes it seems like two queries are being used and the beginner will not understand which one takes precedence or when the ‘filter’ option should be used.
The ‘Query using a data connection’ action is the query that populates the data connection, while the ‘filter…’ button used when assigning values to a field assigns a value to a field from a Data Connection that has already been populated. Only the rows returned by the query are available to controls within your form. Rows that have been excluded from the Data Connection (through the setting of a query field) are not available even though they are in the SharePoint list
For example, if in a SharePoint list we have the following table:
| Row ID | Key | Department | First Name | Last Name |
| 1 | P001 | IT | John | Smith |
| 2 | P006 | IT | Lynette | Lee |
| 3 | Q001 | IT | Mark | Charter |
| 4 | Q002 | IT | Kevin | Jenzen |
| 5 | Q003 | HR | Joe | Bloggs |
| 6 | Q004 | HR | Sue-Anne | Harding |
| 7 | Q005 | Sales | Mike | Smith |
… and you set the data connection query field ‘Department’ to ‘IT’ and query the table, the system will make the following records available to any control that uses this list
| Row ID | Key | Department | First Name | Last Name |
| 1 | P001 | IT | John | Smith |
| 2 | P006 | IT | Lynette | Lee |
| 3 | Q001 | IT | Mark | Charter |
| 4 | Q002 | IT | Kevin | Jenzen |
The other list items (ID’s 5, 6 and 7) will not appear and are not available to any of the controls that access this list. If you want them to be available, you would need to set the query field of ‘Department’ to blank and redo the query
Now consider that we have 4 rows of data in the Data Connection and we wish to display the first and last names of the approver ID selected from a combo. In this case we would need to filter the 4 rows in the data connection to get the correct names to display
You do NOT need to always filter and a good rule of thumb is that if your Data Connection returns a single record, or you do not care about the value, then no filtering is needed. If multiple rows can be returned by the query and you care about the data displayed, then you need to filter
In short, though:
If the connection will return a single record available, do a straight assign
If the connection returns multiple records, do a filtered assign
Straight assign
In the example below I assign the email address of the user from the ‘User Information List’ to a field called ‘CurrentUserEmail’
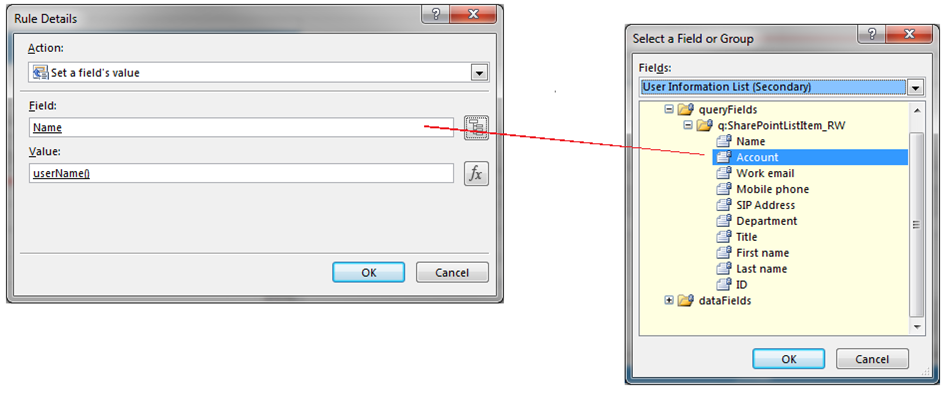 Here I set the query field Account (which strangely enough displays as ‘name’ in the Rule Details box) to the function ‘userName()’.
Next, I query the User Information list. Since the query will be based on the name of the current user, only a single row from the User Information list will be returned as there is always only one account with the value in ‘userName()’

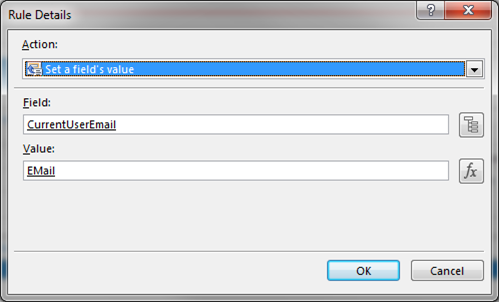
Now, I want to set and display a field that contains the users email. Since I know the ‘user Information List’ will only be populated with a single row, I can do a straight assign
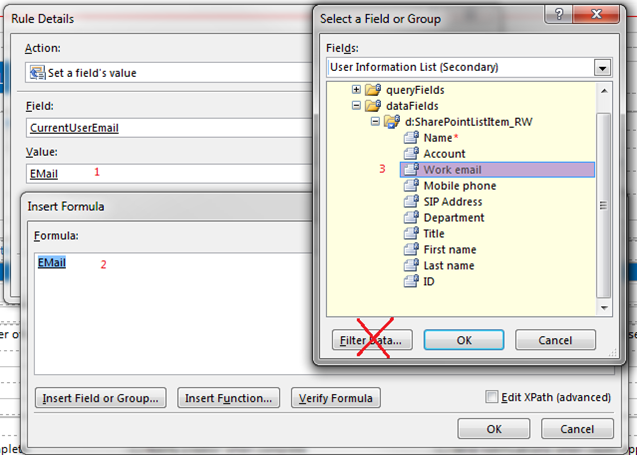
I use the ‘Insert Field or Group’ button to select the ‘Work Email’ field from the list of available fields in the ‘User Information List (Secondary)’. Since I know that there is only a single record in memory, I do not need to use the ‘Filter Data …’ option. You would click OK all the way through to save your changes
Filtered assign
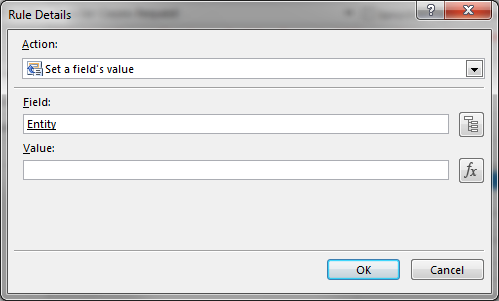
In the next example, I am working with a form that allows the user to select a Location from a list of locations. I then want to default the Entity value on the form to the default Entity value for that location
Add an action rule to perform the assign statement
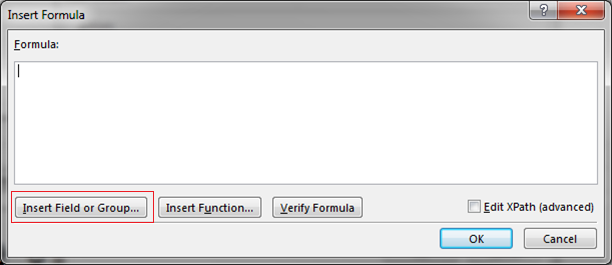
Click on the function button to open up the ‘Insert Formula’ dialog box and then click on the ‘Insert Field or Group …’ button
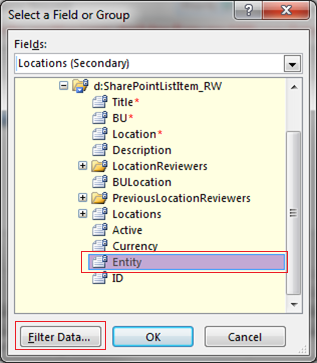
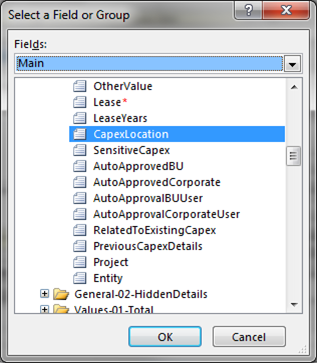
 Once you click the ‘Insert Field or Group …’ button, a ‘Field’ selection box will be displayed, initially set to ‘Main’. I use the drop-down arrow to select the list I want – in this case ‘Locations (Secondary). This will display fields similar to the following

I want to get the value of the Entity in my form, however, which location record should I use to get Entity as the system has multiple location records in memory? I had previously selected a location I needed from the list of locations and saved it to the field called ‘CapexLocation’, so now I will use that value to make sure I get the correct entity in my form
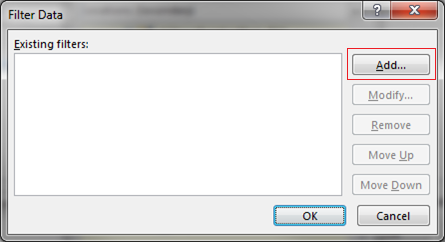
To specify which record I need to use, I select the ‘Filter Data…’ button which opens up a form similar to the following. I select ‘Add…’ from the dialog box
This opens yet another window where I specify the criteria to use to select the correct Location record as shown below. I click on the drop down box and select ID (I select ID because my ‘CapexLocation’ field on my form contains Location ID but displays the location name. This can cause some confusion to new users of InfoPath)
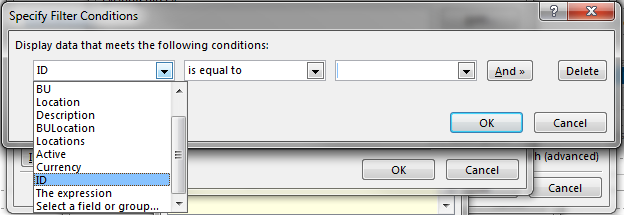
I leave the condition as ‘is equal to’ and set the last combo box to ‘Select a field or group …

… and another dialog box opens up allowing me to select the ‘CapexLocation’ from the ‘Main’ group
After clicking on ‘OK’ [more than] a few times, we end up with the following in the Formula dialog box
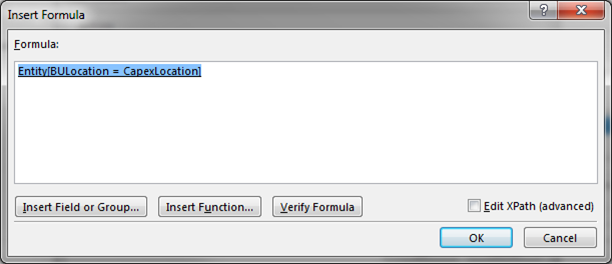
The system will now return the Entity related to the Capex Location that I had previously selected. You can now click OK once again to finalize your setting. The system will now return the correct entity from the location list based on the location ID in the form


