If you are using the App Step in workflows (and I believe you should), then you need to specify which sites the workflow can update and the level of control that the workflow App Step will have within the sites (i.e. Can the workflow update the current site, the current site and the parent site or the entire site collection?). Failure to use the App Step can result in suspended workflows since the workflow object may be unable to read from or write to SharePoint lists)
Most of the data presented here is a direct copy of a great Microsoft article Create a workflow with elevated permissions by using the SharePoint 2013 Workflow platform
To enable the SharePoint Designer Workflows to have full control
Activate the “Workflows can use app permissions” site feature in the site where the workflow exists.
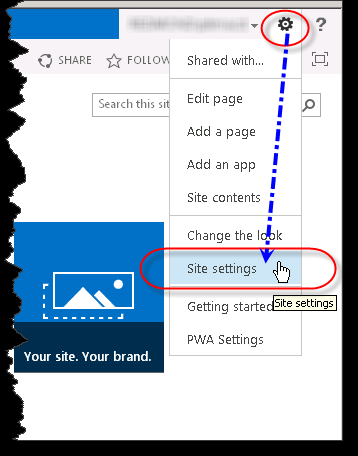
This is done in Site Settings>Site Actions>Manage site features>Workflows can use app permissions
![]()
Get the Workflow App Identifier
Navigate to Site Settings> Site app permissions where you will see an item called workflow as shown below

Copy the client portion of the App Identifier as shown below (the data between the | and @ characters , exclusive)

Give the workflow Full Control
Navigate to <site url>/_layouts/15/appinv.aspx to configure permissions. Then add the client section of the App Identifier in the App Id section and click Lookup to populate the content.
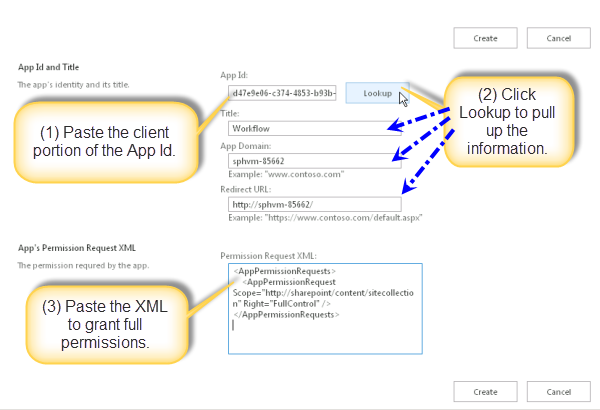
Paste the scope of the Full Control into the ‘Permission Request XML’ fill-in as follows:
For rights to the current site (Most common usage), paste this into the Permission Request XML exactly:
<AppPermissionRequests>
<AppPermissionRequest Scope=”http://sharepoint/content/sitecollection/web” Right=”FullControl” />
</AppPermissionRequests>
For rights to the entire collection, paste this into the Permission Request XML exactly (You will need tenant access to do this):
<AppPermissionRequests>
<AppPermissionRequest Scope=”http://sharepoint/content/tenant” Right=”FullControl” />
</AppPermissionRequests>
For rights to the current, parent and sub-sites, paste this into the Permission Request XML exactly:
<AppPermissionRequests>
<AppPermissionRequest Scope=”http://sharepoint/content/sitecollection” Right=”FullControl” />
</AppPermissionRequests>
In some cases you may be dealing with user related data, such as getting the manager for a particular user. In this case you will need to scope as follows (I found that I was unable to get the manager details unless I had this scope set):
<AppPermissionRequests>
<AppPermissionRequest Scope=”http://sharepoint/social/tenant” Right=”FullControl” />
</AppPermissionRequests>
Note 1.
Previously I experienced an ‘Unauthorized’ response from a workflow REST call to add a user to a group. This problem was fixed by specifying the Workflow Request scope, as ‘http://sharepoint/content/sitecollection’ since the users are defined for the entire collection and not for the individual sub-sites
Note 2.
If you want a workflow to have multiple scope requests, you need to add the Application Requests Scopes into a single statement, for example:
<AppPermissionRequests>
<AppPermissionRequest Scope=”http://sharepoint/content/sitecollection” Right=”FullControl” />
<AppPermissionRequest Scope=”http://sharepoint/social/tenant” Right=”FullControl” />
</AppPermissionRequests>
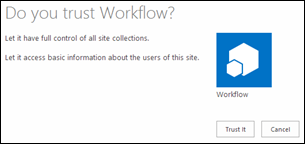
Trust the workflow
You will then need to trust the workflow by clicking on the ‘Trust it’ button in the dialog box that is displayed
Ensure that the App Step’ option is available in the Designer
If the App Step option is not available in the SharePoint Designer menu, exit from the Designer and restart it. The ‘App Step’ should then be available
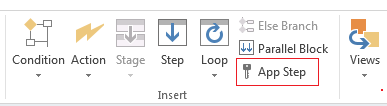
Once, you have clicked on ‘App Step’, add all your code within this group.
For more information on scoping, check out this excellent article by Fabian Williams: Gotcha on SharePoint Designer Workflows in App Step
